
Rich, cheesy, and full of flavor — this Chicken Alfredo Lasagna layers tender noodles, creamy sauce, spinach, and shredded chicken into a comforting baked dish that’s perfect for family dinners or special occasions.
Ingredients
- 3 cups pre-cooked chicken, shredded or chopped
- 9 lasagna noodles, cooked and drained
- 1 (15–16 oz) jar Alfredo sauce
- 8 cups shredded six-cheese blend
- Parmesan cheese for sprinkling
- 1 (13–14 oz) can spinach, drained
Instructions
- Preheat the oven:
Set the oven to 375°F (190°C) and lightly grease a 9×13-inch baking dish. - Prepare the layers:
- Bottom layer: Lay 3 lasagna noodles across the bottom of the pan. Spread a layer of Alfredo sauce over the noodles. Sprinkle about one-third of the shredded cheese blend and a light layer of Parmesan cheese. Add small pinches of spinach (about one-third of the can) and top with approximately 1 cup of chicken.
- Middle layer: Repeat the same process with another 3 noodles, sauce, cheese, spinach, and chicken.
- Top layer: Place the final 3 noodles, spread the remaining Alfredo sauce, and generously top with the rest of the shredded cheese blend and a sprinkle of Parmesan.
- Bake:
Cover loosely with foil and bake for 20 minutes. Remove the foil and continue baking for an additional 10 minutes, or until the top is golden brown and bubbling. - Serve:
Let the lasagna rest for 10 minutes before slicing. Serve warm and enjoy your Creamy Chicken Alfredo Lasagna!
Tip:
For added flavor, mix a dash of Italian seasoning or a sprinkle of garlic powder into the Alfredo sauce before layering. Fresh spinach can be substituted for canned if preferred.
MAC-N-BROC CHICKEN & CHEESE

Creamy, comforting, and packed with flavor — this Mac-n-Broc Chicken & Cheese is a delicious twist on classic macaroni and cheese. Tender noodles, melty Colby Jack cheese, savory chicken, and broccoli come together for an easy, satisfying meal the whole family will love.
Ingredients
- 1½ cups elbow noodles, cooked and drained
- 1 (10.5 oz) can broccoli cheese soup
- 2 cups of chopped frozen broccoli
- 4 cups shredded Colby Jack cheese
- ¼ cup margarine (or butter)
- ½ cup milk
- 2 cups of pre-cooked chicken, shredded or chopped
- 1 tablespoon minced onion
- ½ teaspoon minced garlic
Instructions
- Cook the broccoli:
Place the chopped frozen broccoli in a microwave-safe bowl with a small amount of water. Microwave until tender, about 3–5 minutes, then drain. - Cook the noodles:
Prepare the elbow noodles according to package directions. Drain and set aside. - Combine ingredients:
In a large saucepan over medium heat, combine the cooked noodles, broccoli cheese soup, cooked broccoli, shredded Colby Jack cheese, margarine, milk, pre-cooked chicken, minced onion, and garlic. Stir well until all ingredients are evenly incorporated. - Heat through:
Continue stirring over medium heat until the cheese is fully melted and the sauce is smooth and creamy, about 5–7 minutes. - Serve:
Spoon into bowls and enjoy your warm, cheesy Mac-n-Broc Chicken & Cheese!
Tip:
For extra flavor, sprinkle a bit of black pepper or crushed red pepper flakes on top. To make it a baked version, transfer to a casserole dish, top with breadcrumbs and extra cheese, and bake at 375°F (190°C) for 15–20 minutes until golden.
EASY CHICKEN ALFREDO WITH BROCCOLI
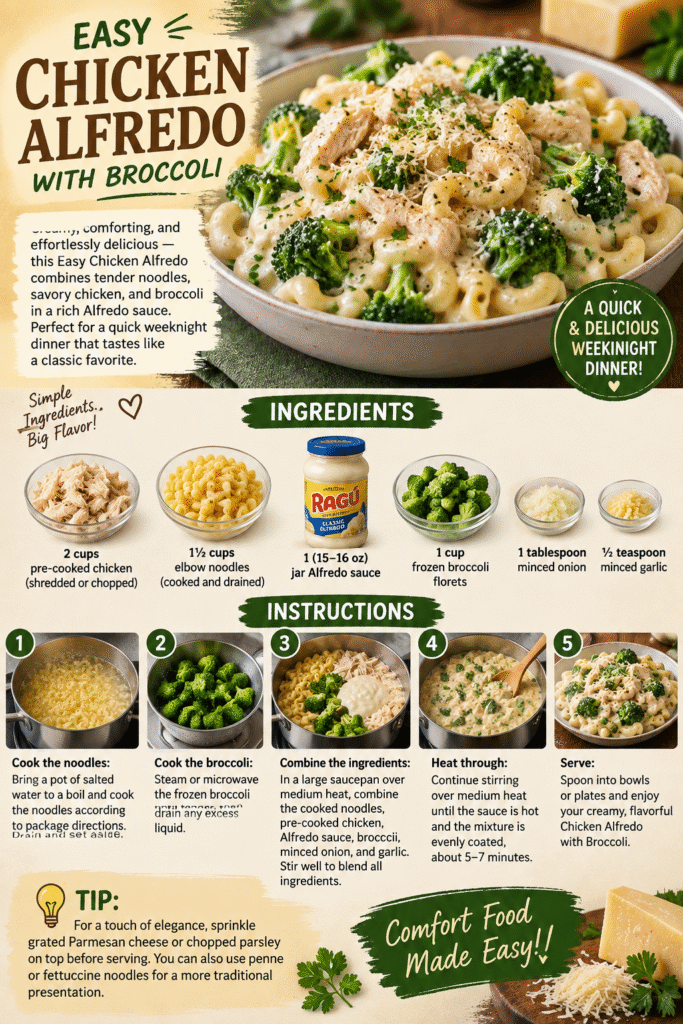
Creamy, comforting, and effortlessly delicious — this Easy Chicken Alfredo combines tender noodles, savory chicken, and broccoli in a rich Alfredo sauce. Perfect for a quick weeknight dinner that tastes like a classic favorite.
Ingredients
- 2 cups of pre-cooked chicken, shredded or chopped
- 1½ cups elbow noodles, cooked and drained
- 1 (15–16 oz) jar Alfredo sauce
- 1 cup frozen broccoli florets
- 1 tablespoon minced onion
- ½ teaspoon minced garlic
Instructions
- Cook the noodles:
Bring a pot of salted water to a boil and cook the noodles according to package directions. Drain and set aside. - Cook the broccoli:
Steam or microwave the frozen broccoli until tender, then drain any excess liquid. - Combine the ingredients:
In a large saucepan over medium heat, combine the cooked noodles, pre-cooked chicken, Alfredo sauce, broccoli, minced onion, and garlic. Stir well to blend all ingredients. - Heat through:
Continue stirring over medium heat until the sauce is hot and the mixture is evenly coated, about 5–7 minutes. - Serve:
Spoon into bowls or plates and enjoy your creamy, flavorful Chicken Alfredo with Broccoli.
Tip:
For a touch of elegance, sprinkle grated Parmesan cheese or chopped parsley on top before serving. You can also use penne or fettuccine noodles for a more traditional presentation.
CLASSIC SPAGHETTI WITH GARLIC AND PARMESAN

Simple, satisfying, and timeless — this Classic Spaghetti with Garlic and Parmesan is a quick and flavorful dish that brings comfort to the table in minutes. Pair it with warm garlic rolls for a complete Italian-inspired meal.
Ingredients
- ¼ package (or more, depending on family size) spaghetti noodles, cooked and drained
- 1 (24 oz) jar traditional spaghetti sauce
- 1 teaspoon garlic salt
- 2 tablespoons Parmesan cheese, grated
Instructions
- Cook the noodles:
Bring a large pot of salted water to a boil. Add the spaghetti noodles and cook according to the package directions until tender. Drain and set aside. - Prepare the sauce:
In a saucepan over medium heat, pour in the spaghetti sauce. Stir in the garlic salt and Parmesan cheese. Heat until warmed through, about 5–7 minutes, stirring occasionally. - Combine and serve:
Pour the warm sauce over the cooked noodles and toss gently to coat. - Garnish:
Sprinkle with additional Parmesan cheese if desired and serve with garlic rolls (see Garlic Rolls Recipe).
Tip:
For extra depth of flavor, add a pinch of Italian seasoning or crushed red pepper flakes to the sauce before heating.
EASY GARLIC ROLLS

Golden, buttery, and bursting with flavor — these Easy Garlic Rolls are the perfect companion to pasta dishes like spaghetti or lasagna. Made with crescent rolls and a few simple ingredients, they’re ready in minutes and always a crowd-pleaser.
Ingredients
- 1 package of crescent rolls
- 2 tablespoons margarine or butter, melted
- ½ teaspoon garlic salt
- 2 tablespoons Parmesan cheese, grated
Instructions
- Preheat the oven:
Set the oven to the temperature listed on the crescent roll package (typically 350–375°F / 175–190°C). - Prepare the rolls:
Unroll the crescent dough and separate into individual triangles. Brush each piece lightly with melted margarine or butter. - Season:
Sprinkle each triangle with garlic salt and Parmesan cheese. Roll up from the wide end to the tip, forming crescent shapes, and place them on a baking sheet. - Bake:
Bake according to the package directions, or until golden brown (usually 10–12 minutes). - Serve:
Remove from the oven and brush lightly with any remaining butter if desired. Serve warm alongside spaghetti or other pasta dishes.
Tip:
For an extra burst of flavor, add a sprinkle of dried parsley or Italian seasoning before baking.
HAM-N-CHEESY TATOS
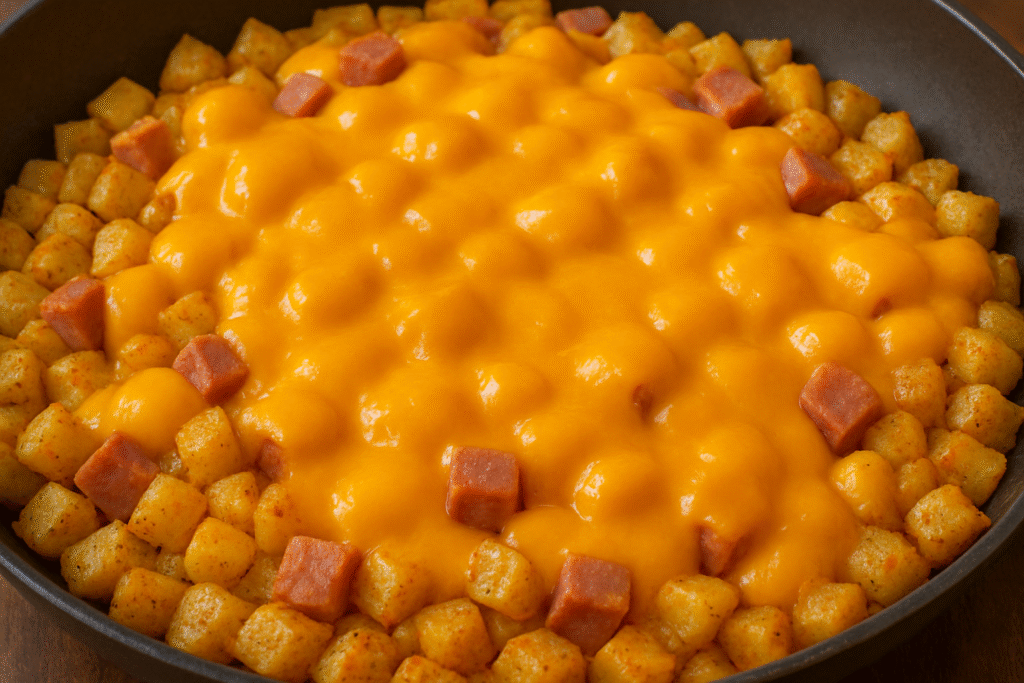
Warm, hearty, and irresistibly cheesy — this Ham-n-Cheesy Tatos recipe brings together crispy hash browns, savory diced ham, and melted cheddar cheese for the ultimate comfort food. Perfect for breakfast, brunch, or an easy weeknight dinner.
Ingredients
- 1 (28–32 oz) bag Southwestern-style frozen hash browns
- 1 package of diced ham (found in the lunch meat section near the bacon)
- 8 cups of shredded mild cheddar cheese
Instructions
- Cook the hash browns:
In a large skillet, cook the hash browns according to the package directions until golden and slightly crispy. - Add the ham and cheese:
Transfer the cooked hash browns to a large saucepan or keep them in the skillet if large enough. Add the diced ham and shredded cheddar cheese. - Melt and mix:
Stir over medium-low heat until the cheese is fully melted and the ingredients are well combined. - Serve:
Spoon onto plates and serve hot. Enjoy your creamy, cheesy Ham-n-Cheesy Tatos!
Tip:
For extra flavor, sprinkle with black pepper or a dash of seasoned salt before serving. You can also top with chopped green onions or serve sour cream for a heartier meal.
CREAMY PUMPKIN SOUP

Smooth, rich, and subtly spiced — this Creamy Pumpkin Soup offers the comforting flavors of pumpkin pie in a warm, velvety bowl. Made in minutes with just a few ingredients, it’s a perfect cozy treat for cool autumn days.
Ingredients
- 1 (15 oz) can pumpkin pie mix (seasoned according to package directions)
- 1 (12 oz) can evaporated milk
- 1½ cups vanilla or plain yogurt
Instructions
- Combine ingredients:
Add the pumpkin pie mix, evaporated milk, and yogurt to a blender. - Blend:
Blend on medium speed until smooth and creamy, reaching a thick, soupy consistency. - Serve:
Pour into bowls and serve warm or chilled, depending on preference. Enjoy your rich and comforting Pumpkin Soup!
Tip:
For a gourmet touch, sprinkle ground cinnamon or nutmeg on top before serving. You can also swirl in a spoonful of whipped cream or Greek yogurt for added texture and presentation.
CLASSIC STUFFED PEPPERS

A timeless comfort dish made simple — these Classic Stuffed Peppers are filled with a hearty blend of seasoned ground beef and Spanish rice, then baked to perfection. Easy to prepare and endlessly satisfying, they make an impressive yet effortless main course.
Ingredients
- Bell peppers — as many as desired (plan for one per guest)
- 1 box Spanish rice mix (per 4 peppers)
- 1 pound ground beef (per box of rice)
Instructions
- Preheat the oven:
Set oven to 375°F (190°C). - Cook the rice and beef:
Prepare the Spanish rice according to package directions.
In a skillet, brown the ground beef over medium heat until fully cooked. Drain excess fat. - Prepare the peppers:
Slice each bell pepper in half lengthwise (from top to bottom) to create two boat-shaped halves. Remove seeds and membranes. - Assemble the filling:
In a large bowl, combine the cooked rice and beef. Stir until evenly mixed. - Stuff the peppers:
Spoon the rice and beef mixture into each pepper half, filling them generously. - Wrap and bake:
Individually wrap each stuffed pepper in aluminum foil and place them on a baking sheet.
Bake for 1 hour, or until the peppers are tender and heated through. - Serve:
Let cool for about 5 minutes before unwrapping. Serve warm and enjoy your Classic Stuffed Peppers!
Tip:
For extra flavor, top the filling with shredded cheese before wrapping, or drizzle with tomato sauce before serving. These also reheat beautifully for meal prep or next-day lunches.
EASY CHEESE BREAD
A timeless comfort dish made simple — these Classic Stuffed Peppers are filled with a hearty blend of seasoned ground beef and Spanish rice, then baked to perfection. Easy to prepare and endlessly satisfying, they make an impressive yet effortless main course.
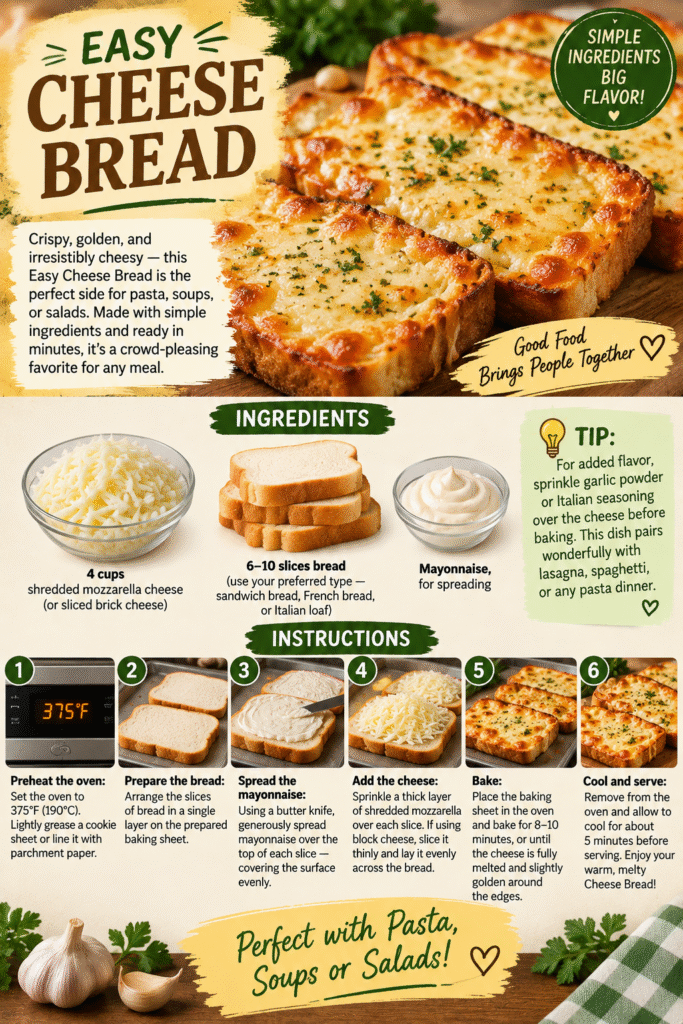
Ingredients
- 4 cups of shredded mozzarella cheese (or sliced brick cheese)
- 6–10 slices bread (use your preferred type — sandwich bread, French bread, or Italian loaf)
- Mayonnaise, for spreading
Instructions
- Preheat the oven:
Set the oven to 375°F (190°C). Lightly grease a cookie sheet or line it with parchment paper. - Prepare the bread:
Arrange the slices of bread in a single layer on the prepared baking sheet. - Spread the mayonnaise:
Using a butter knife, generously spread mayonnaise over the top of each slice — covering the surface evenly. - Add the cheese:
Sprinkle a thick layer of shredded mozzarella over each slice. If using block cheese, slice it thinly and lay it evenly across the bread. - Bake:
Place the baking sheet in the oven and bake for 8–10 minutes, or until the cheese is fully melted and slightly golden around the edges. - Cool and serve:
Remove from the oven and allow to cool for about 5 minutes before serving. Enjoy your warm, melty Cheese Bread!
Tip:
For added flavor, sprinkle garlic powder or Italian seasoning over the cheese before baking. This dish pairs wonderfully with lasagna, spaghetti, or any pasta dinner.
CLASSIC THREE-LAYER LASAGNA

Rich, cheesy, and full of comforting flavor — this Classic Three-Layer Lasagna is a simple yet delicious take on a timeless favorite. With layers of noodles, savory sauce, and plenty of melted mozzarella, it’s the perfect centerpiece for any family dinner.
Ingredients
- 9 lasagna noodles, cooked and drained
- 1 (24–26 oz) jar mushroom spaghetti sauce
- 2 (8-cup) packages shredded mozzarella cheese
- (Optional: add 1 pound of cooked ground beef, sausage, or chicken for a heartier version)
Instructions
- Preheat the oven:
Set the oven to 350°F (175°C). Lightly grease a 9×13-inch baking dish. - Prepare the noodles:
Cook the lasagna noodles according to the package directions. Drain and set aside. - Assemble the lasagna:
- Bottom layer: Lay 3 noodles across the bottom of the pan. Spread a layer of spaghetti sauce over the noodles, then sprinkle a generous amount of mozzarella cheese.
- Middle layer: Repeat with another 3 noodles, more sauce, and another layer of cheese.
- Top layer: Add the remaining 3 noodles, spread the last of the sauce evenly, and top with all remaining mozzarella cheese.
- Bake:
Place the pan in the oven and bake for 30–35 minutes, or until the cheese is fully melted and the edges are golden brown. - Cool and serve:
Remove from the oven and let rest for 10 minutes before slicing. Serve warm and enjoy your Classic Three-Layer Lasagna!
Tip:
For extra flavor, sprinkle Parmesan or Italian seasoning on the top layer before baking. Serve with garlic rolls or cheese bread for the ultimate pasta night.
OPEN-FACED TURKEY MELT (Old Army Favorite)
(Also affectionately known as “Sh—t on a Shingle”)
A hearty, comforting dish with a touch of military nostalgia — this Open-Faced Turkey Melt combines warm turkey in gravy, melted cheese, and golden grilled bread. It’s a quick, satisfying classic that has been loved by servicemen and home cooks alike for generations.

Ingredients
- 2 slices of bread
- 1 boxed package of sliced turkey in gravy (premade)
- 1 slice yellow American cheese
- Mustard, for topping
- Margarine or butter, for spreading
Instructions
- Heat the turkey:
Prepare the turkey and gravy according to the package directions (typically by microwaving). Keep warm. - Prepare the bread:
Spread margarine or butter on one side of each slice of bread. - Assemble the sandwich:
- Place one slice of bread, butter-side down, in a skillet over medium heat.
- Layer the cheese and slices of warm turkey on top.
- Place the second slice of bread on top, butter-side up, forming a sandwich.
- Grill the sandwich:
Cook until the bottom is golden brown, then flip and grill the other side until the cheese is melted and both sides are crisp and toasted. - Finish and serve:
Remove from the skillet, spread a thin layer of mustard on top, and spoon warm gravy over the sandwich. Serve immediately for a true comfort meal — Open-Faced Turkey Melt, an old Army favorite.
Tip:
For a more traditional, hearty version, serve the sandwich open-faced with mashed potatoes on the side and drizzle extra gravy over everything.
📜 A Bit of History
This dish earned its colorful nickname, “Sh—t on a Shingle,” during World War II, when it was a staple meal served in U.S. Army mess halls. Traditionally made with chipped beef and white gravy on toast, it became a symbol of simple, filling food that could feed many with minimal ingredients. Over time, variations like this turkey-and-gravy version have brought the classic into home kitchens — proving that even humble beginnings can inspire lasting comfort.
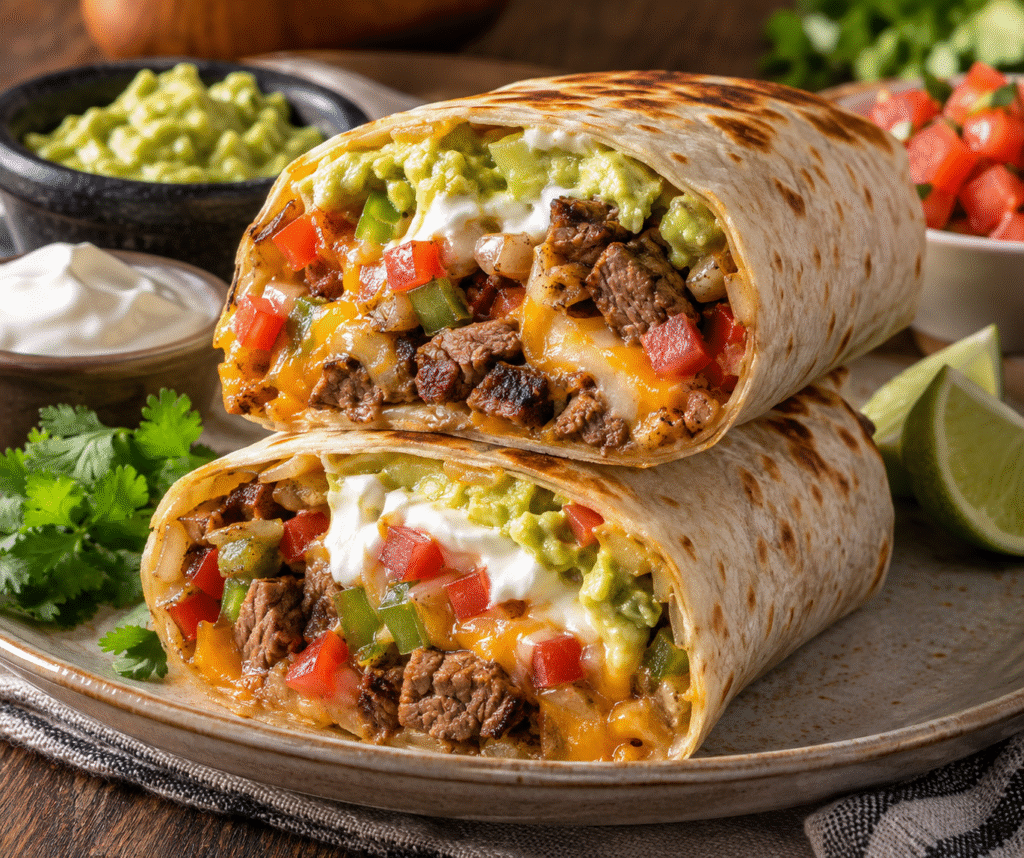
California Burrito
A warm, cheesy burrito loaded with seasoned steak or chicken, fresh peppers and tomatoes, creamy queso, guacamole, and sour cream. Quick, filling, and easy to customize.
Ingredients
Makes 4 burritos
- 4 large flour tortillas
- 1 lb steak or chicken, cooked and sliced or diced
- 1 cup shredded Mexican-blend cheese
- ½ cup queso cheese sauce
- 1 medium tomato, diced
- 1 bell pepper, diced or thinly sliced
- ½ cup sour cream
- ½ cup guacamole
- Water, as needed for softening tortillas
Directions
- Soften the tortillas:
Lightly sprinkle each tortilla with a few drops of water. Place one tortilla on a microwave-safe plate and microwave for about 10 seconds, or until warm and flexible. - Add the filling:
Place the diced peppers and tomatoes in the center of the tortilla. Top with the cooked steak or chicken. - Add the cheese:
Sprinkle with Mexican-blend cheese and drizzle with queso. Microwave for 30–60 seconds, or until the cheese is melted and the filling is hot. - Add the toppings:
Spoon sour cream and guacamole over the warm filling. - Roll the burrito:
Fold the sides of the tortilla inward, then roll tightly from the bottom to form a burrito. - Serve:
Serve immediately while warm. Add extra queso, sour cream, or guacamole on the side, if desired.
Tip: For extra flavor and texture, place the finished burrito seam-side down in a hot skillet for 1–2 minutes per side until lightly golden and crisp.